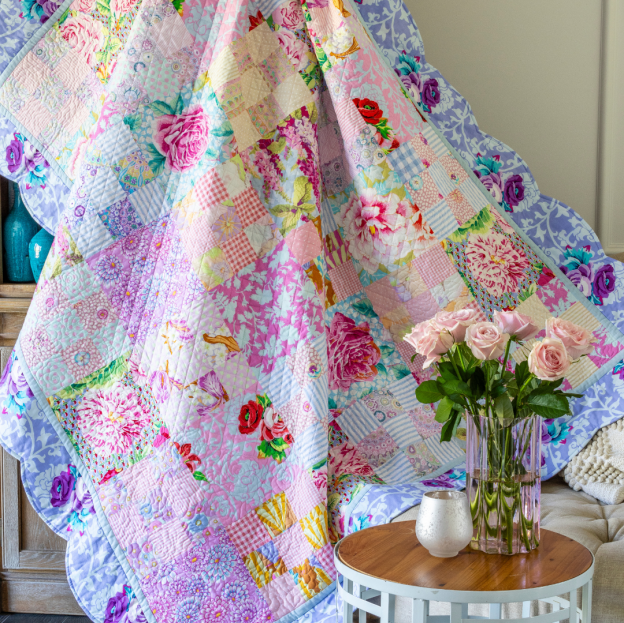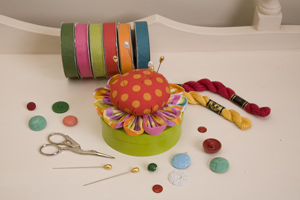
Collect some bright fun fabric scraps, a round papier maché box and some paint. In no time at all, you can create a great pincushion box that is sure to be popular at your local craft stall or school fete. Designed by Christine Book of Sew Christine Book, this fun-loving project is simple enough even for the kids to create.
Materials
20cm (8in) square of red and orange spot print fabric (flower centre)
Fat eighth multicoloured swirl print fabric (flower petals)
One 1½ x 4in papier maché box
20cm (8in) square of fusible batting such as Pellon
Acrylic paint in colour to coordinate with fabric
Jo Sonjas All Purpose Sealer
Foam brush or paintbrush
Polyester fibre fill
DMC Perlé No 8 Cotton to match fabric
Hot glue gun and glue sticks
Thin cardboard, paper and 2B pencil
Compass 2 x 4cm (¾ x 1⅝in) magnetic strip
Water-erasable fabric marking pen or tailors chalk
General sewing supplies
Finished size: 9cm high x 10cm diameter (3½in high x 4in diameter)
Stitches used: Running stitch
Note: Please read all instructions before commencing the project. Careful and accurate cutting and sewing is essential to ensure success with this project. A seam allowance of ¼in is included. It is recommended that fabrics be 100% cotton, pre-washed and well ironed.
Preparation and cutting
1. Paint the papier maché box with two to three coats of your chosen acrylic paint using the foam brush or paintbrush, letting the box dry thoroughly between each coat of paint. Paint the box with two coats of All Purpose Sealer, letting it dry as you did for the paint.
2. Using the hot glue gun, glue the magnetic strip into the centre of the inside of the box base. This will ensure your pins will always stay put, even if you drop the box. Christine recycles magnetic strips that come on advertising material found in her letterbox.
3. Use a compass to draw two circles on the cardboard. One should have a radius of 3½in (flower centre) and the other should have a radius of 1¾in (flower petals). Cut the two circles out on the lines.
Flower
4. Trace around the flower centre template onto the wrong side of each of the red and orange spot print fabric and the batting. Cut each circle out on the traced line. Fuse the batting circle to the wrong side of the red and orange spot print circle.
5. Using a long length of Perlé cotton, work large running stitches a scant ¼in from the raw edge of the circle. Pull the thread up to gather the fabric.
6. Stuff the flower centre firmly with fibre fill so that it holds its shape when squeezed. When you have filled the circle firmly enough, tie the gathering thread off securely and bury the ends in the stuffed circle. Set it aside.
7. Trace 11 flower petal circle templates onto the wrong side of the multicoloured swirl print fabric. Cut each circle out on the traced line. Fold each petal in half, wrong sides together, and press.
8. Using a long length of Perlé cotton, work long running stitches a scant ¼in from the curved edges of the petal semi-circle through both layers of fabric. Pull up the gathers tightly. Continue to add gathered petals to your thread until all 11 petals are gathered and stitched in place.
9. Push each petal close to the last petal until you form a circle of petals. This technique is known as petals on a string, a Baltimore album technique. Securely sew the first petal to the last petal to form a ring.
Assembly
10. Glue the circle of petals onto the lid of your painted box. Apply hot glue to the back of the fabric petals and position them in place on the centre of the lid. Hold them in place for a minute to secure. Set aside for a few minutes while the glue dries.
11. When the glue has dried and the petals are secure, glue the stuffed flower centre in place. Again, apply small amounts of hot glue to the centre of the petal ring and position the flower centre in place. Hold it in place for a minute to secure.
The fabric flower featured on the pincushion box originally started life as a fabric brooch. Christine designed it as a quick embellishment project for classes. As a brooch, they look great pinned onto a bag, pincushion, winter jumper or scarf. Christines brooch has six petals, a folded puff centre and a folded circle leaf. Christine also included a button in the centre and a crocheted string as she did on her Pocket Full Of Pins project featured in Homespun Vol 9 No 9.
For more information about other wonderful designs by Christine Book of Sew Christine Book, write to 104 Sanctuary Drive, Windsor Downs NSW 2756 or phone/fax on (02) 4574 3358.